Hey there, fellow stamping mold enthusiasts! I'm part of a stamping mold supplier team, and today I'm super stoked to share with you the ins and outs of designing a stripper plate for a stamping mold. It's a crucial component that can make or break the efficiency and quality of your stamping operations, so let's dive right in!
Understanding the Stripper Plate
First things first, what's a stripper plate anyway? Well, in a stamping mold, the stripper plate plays a vital role in stripping the workpiece from the punch after the stamping process. It helps keep the material in place during the stamping operation and prevents it from sticking to the punch, which can cause all sorts of issues like poor part quality and increased wear on the mold.
There are two main types of stripper plates: fixed strippers and floating strippers. Fixed strippers are attached directly to the die set and are used for lighter stamping operations. Floating strippers, on the other hand, are mounted on springs or other elastic elements and can move relative to the die set. They're typically used for heavier stamping jobs where more force is required to strip the material.
Factors to Consider When Designing a Stripper Plate
Now that we know what a stripper plate is and what it does, let's talk about the key factors you need to consider when designing one.
Material Selection
The choice of material for your stripper plate is crucial. You want a material that's strong, wear-resistant, and has good dimensional stability. Common materials used for stripper plates include tool steel, alloy steel, and high-speed steel. Tool steel is a popular choice because it's relatively inexpensive and has good hardness and toughness. Alloy steel offers better wear resistance and can handle higher loads, while high-speed steel is the most expensive but provides excellent wear resistance and heat resistance.
Stripping Force
Calculating the stripping force is essential to ensure that your stripper plate can effectively remove the workpiece from the punch. The stripping force depends on several factors, including the type of material being stamped, the thickness of the material, the shape and size of the punch, and the surface finish of the punch and die. You can use empirical formulas or software tools to estimate the stripping force, but it's always a good idea to do some testing to validate your calculations.
Clearance
Proper clearance between the stripper plate and the punch is critical for smooth operation. If the clearance is too small, the stripper plate may bind on the punch, causing excessive wear and potentially damaging the mold. On the other hand, if the clearance is too large, the material may not be stripped properly, leading to poor part quality. The ideal clearance depends on the type of material being stamped and the thickness of the material. As a general rule of thumb, the clearance should be between 0.002 and 0.005 inches per side for most materials.
Spring Selection
If you're using a floating stripper plate, you need to select the right springs to provide the necessary stripping force. The springs should be strong enough to overcome the stripping force but not so strong that they cause excessive wear on the stripper plate or the mold. You also need to consider the spring rate, which is the amount of force required to compress the spring a certain distance. A higher spring rate means more force is required to compress the spring, while a lower spring rate means less force is required.
Surface Finish
The surface finish of the stripper plate can have a significant impact on its performance. A smooth surface finish helps reduce friction between the stripper plate and the material, making it easier to strip the workpiece from the punch. You can achieve a smooth surface finish by machining the stripper plate to a high tolerance and then polishing it.
Design Steps
Now that we've covered the key factors to consider, let's walk through the design steps for a stripper plate.
Step 1: Determine the Stripping Force
As mentioned earlier, calculating the stripping force is the first step in designing a stripper plate. Use the appropriate formulas or software tools to estimate the stripping force based on the material properties, punch size, and other relevant factors.
Step 2: Select the Material
Based on the stripping force and the requirements of your stamping operation, choose the appropriate material for the stripper plate. Consider factors such as strength, wear resistance, and cost when making your selection.
Step 3: Calculate the Clearance
Determine the ideal clearance between the stripper plate and the punch based on the material thickness and type. Make sure to allow for some tolerance to account for manufacturing variations.
Step 4: Select the Springs (if applicable)
If you're using a floating stripper plate, select the springs that will provide the necessary stripping force. Consider the spring rate, maximum compression, and fatigue life when making your selection.
Step 5: Design the Stripper Plate Geometry
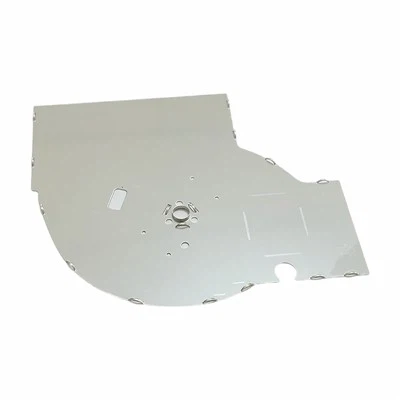
The geometry of the stripper plate should be designed to ensure that it can effectively strip the material from the punch. This may involve creating cutouts or slots in the stripper plate to accommodate the punch and the material. You also need to consider the location and size of the mounting holes and any other features that may be required for the stamping operation.
Step 6: Create a 3D Model
Use a CAD software program to create a 3D model of the stripper plate. This will allow you to visualize the design and make any necessary adjustments before manufacturing.


Step 7: Perform Finite Element Analysis (FEA)
If possible, perform a finite element analysis on the 3D model to simulate the stress and deformation of the stripper plate during the stamping operation. This will help you identify any potential issues and optimize the design for maximum performance.
Step 8: Manufacture the Stripper Plate
Once you're satisfied with the design, it's time to manufacture the stripper plate. This may involve machining, heat treating, and finishing operations to achieve the desired dimensions and surface finish.
Examples of Applications
Stripper plates are used in a wide variety of stamping applications. For instance, in the production of Fisheye Terminals, a well - designed stripper plate ensures that the terminals are accurately stamped and smoothly removed from the punch. This is crucial for maintaining the high quality and precision required in electrical components.
Another example is the manufacturing of Pillow Covers. The stripper plate helps in stamping the fabric or other materials used for the pillow covers, ensuring clean cuts and efficient production. And when it comes to Pillows themselves, if there are any stamping operations involved in their production, such as creating decorative patterns or shaping components, the stripper plate plays an important role in getting the job done right.
Wrapping Up and Invitation
Designing a stripper plate for a stamping mold is a complex but rewarding process. By considering the factors we've discussed and following the design steps, you can create a stripper plate that will improve the efficiency and quality of your stamping operations.
If you're in the market for high - quality stamping molds or need help with designing a stripper plate for your specific application, don't hesitate to reach out to us. We're a stamping mold supplier with years of experience and a team of experts ready to assist you. Let's start a conversation and see how we can work together to meet your stamping needs.
References
- "Stamping Die Design Handbook" by Peter Ulintz
- "Tool and Manufacturing Engineers Handbook" by Society of Manufacturing Engineers